Below is a picture of my new classroom rules (screenshot from the syllabus). Basically, I just condensed my original 7 rules from before down into 4 rules. 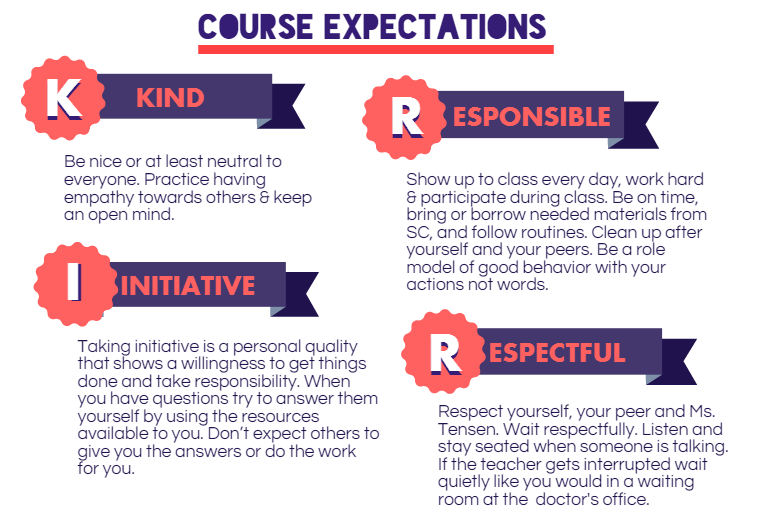 So that's partly what's new with me. I hope you find the information above helpful! If you have any feedback or questions for me let me know in the comments below. I have a whole list of things that I would like to get on here and share with you so please be patient. It's been a busy quarter 1 for me and there are only 11 days left! Thank you for reading and have a good rest of your week! 
0 Comments
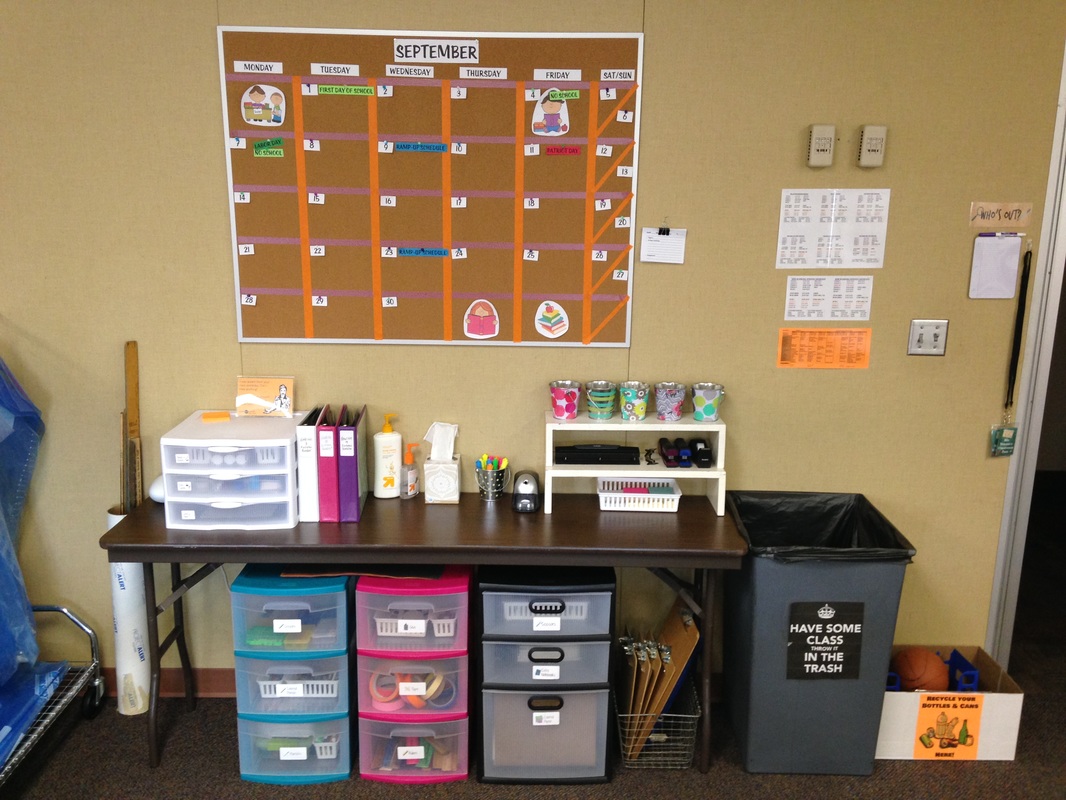
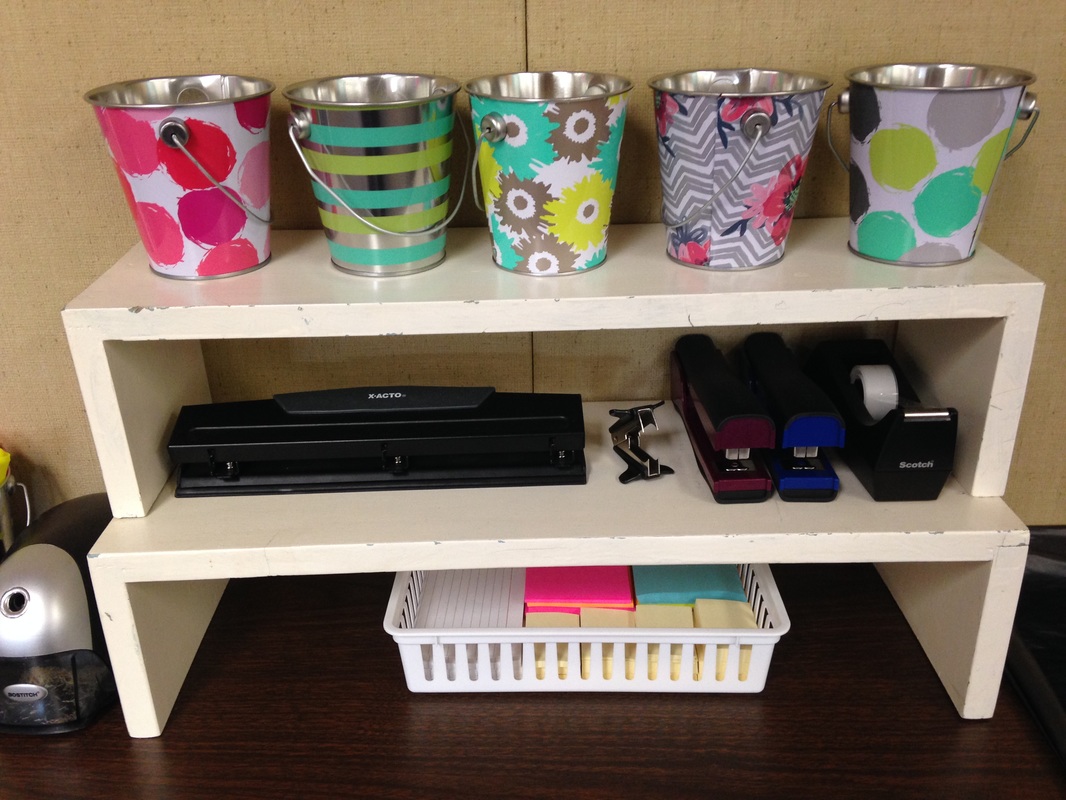
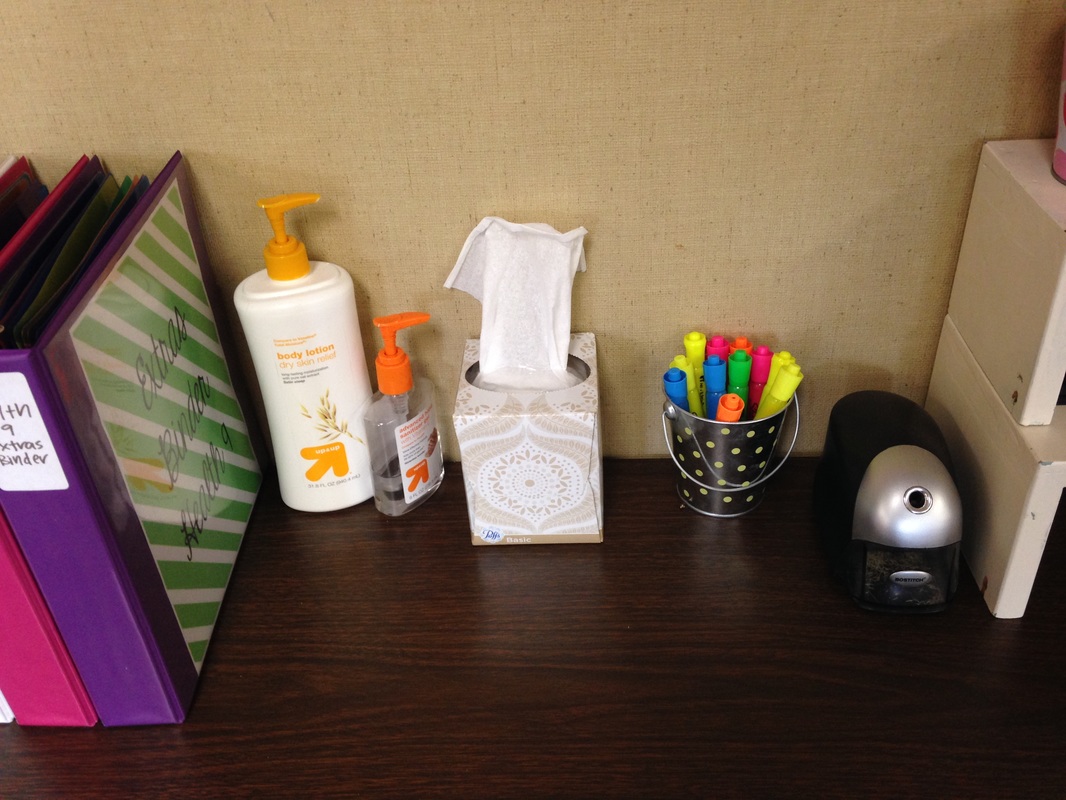
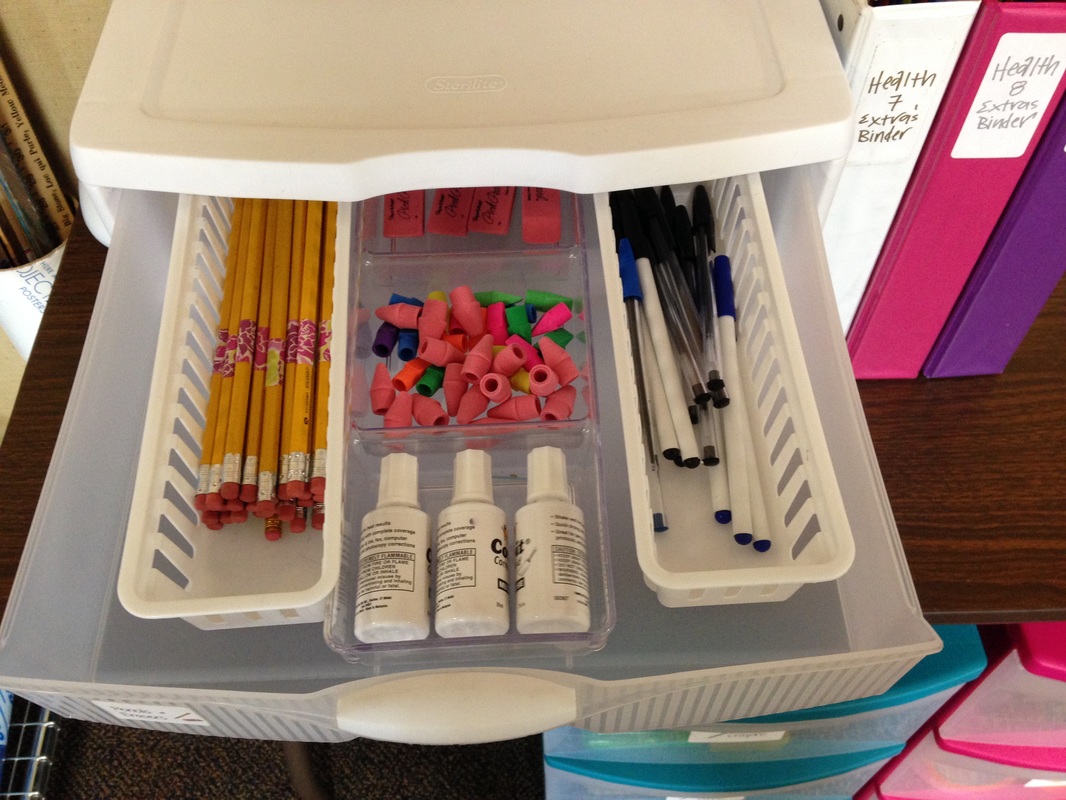
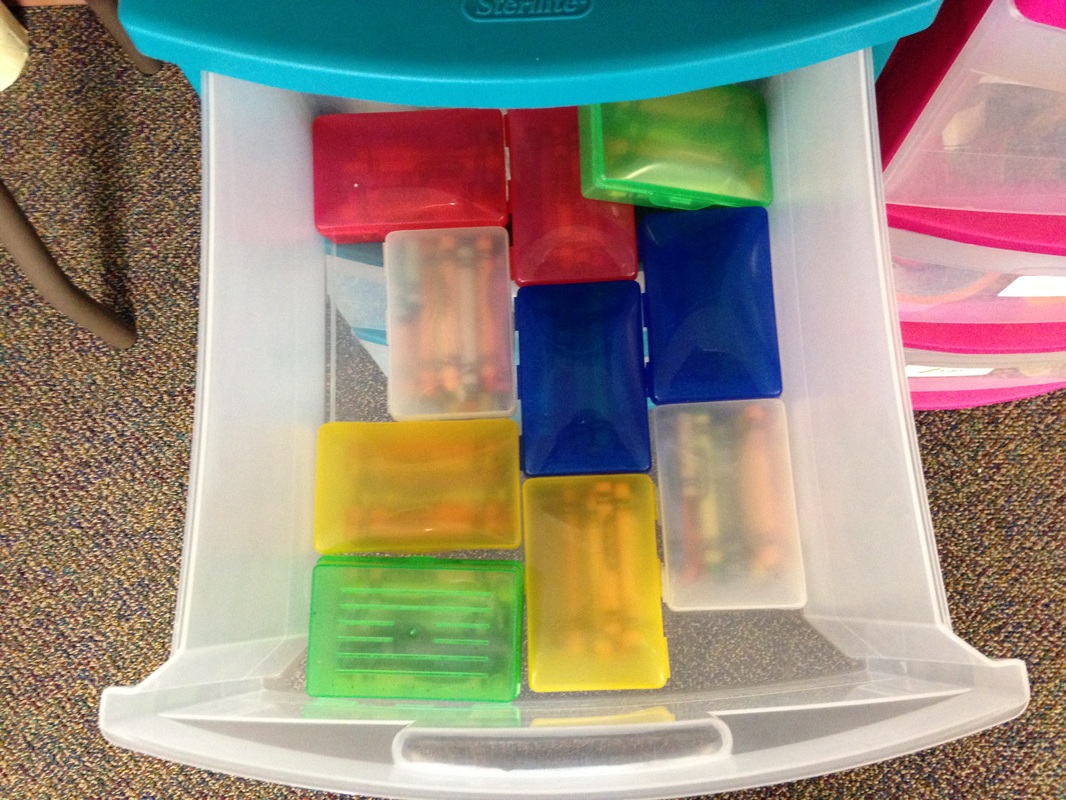
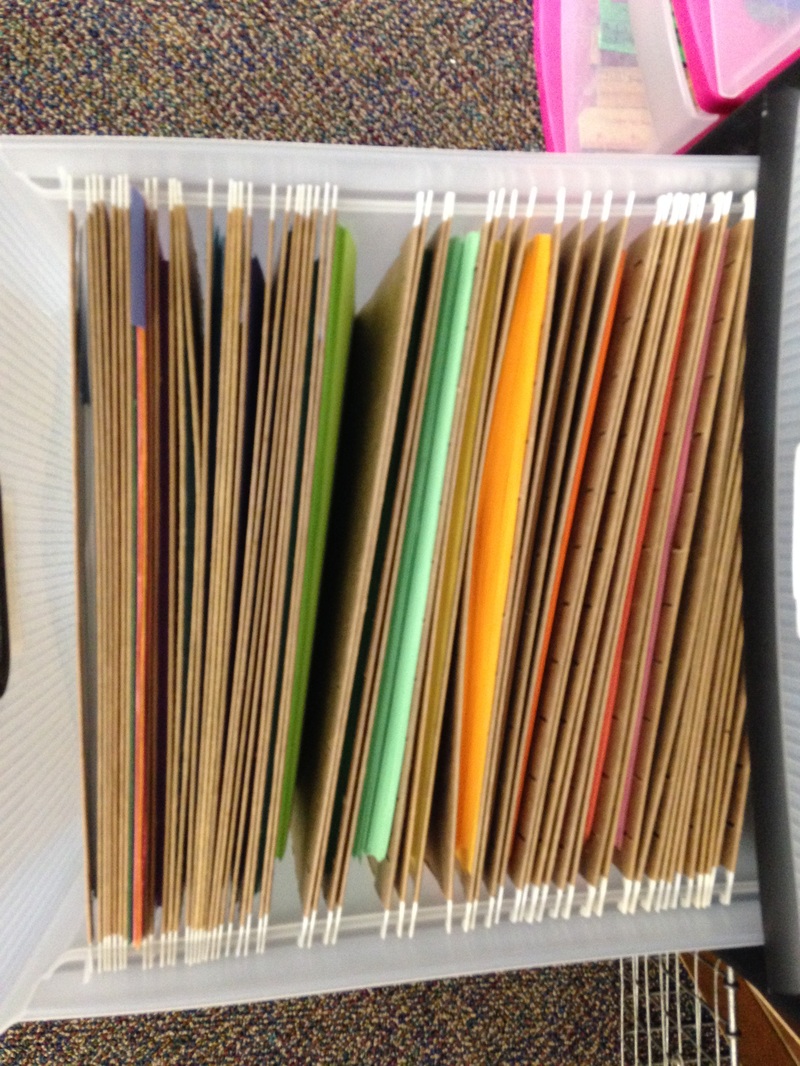
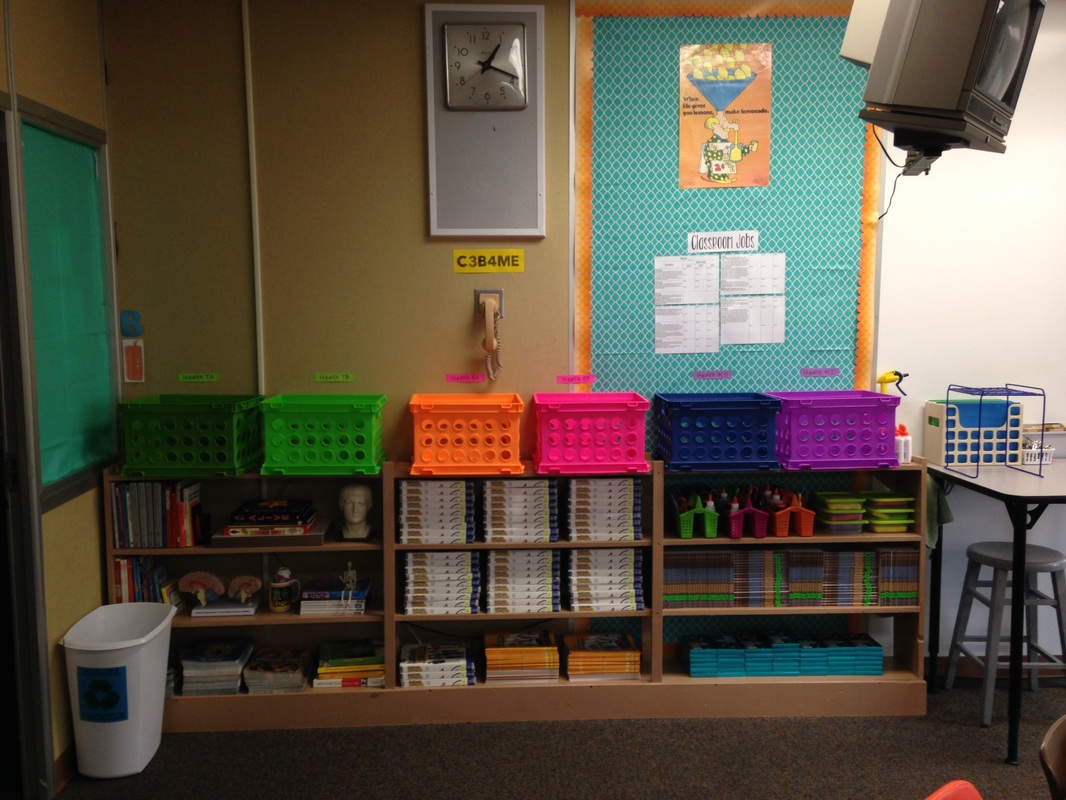
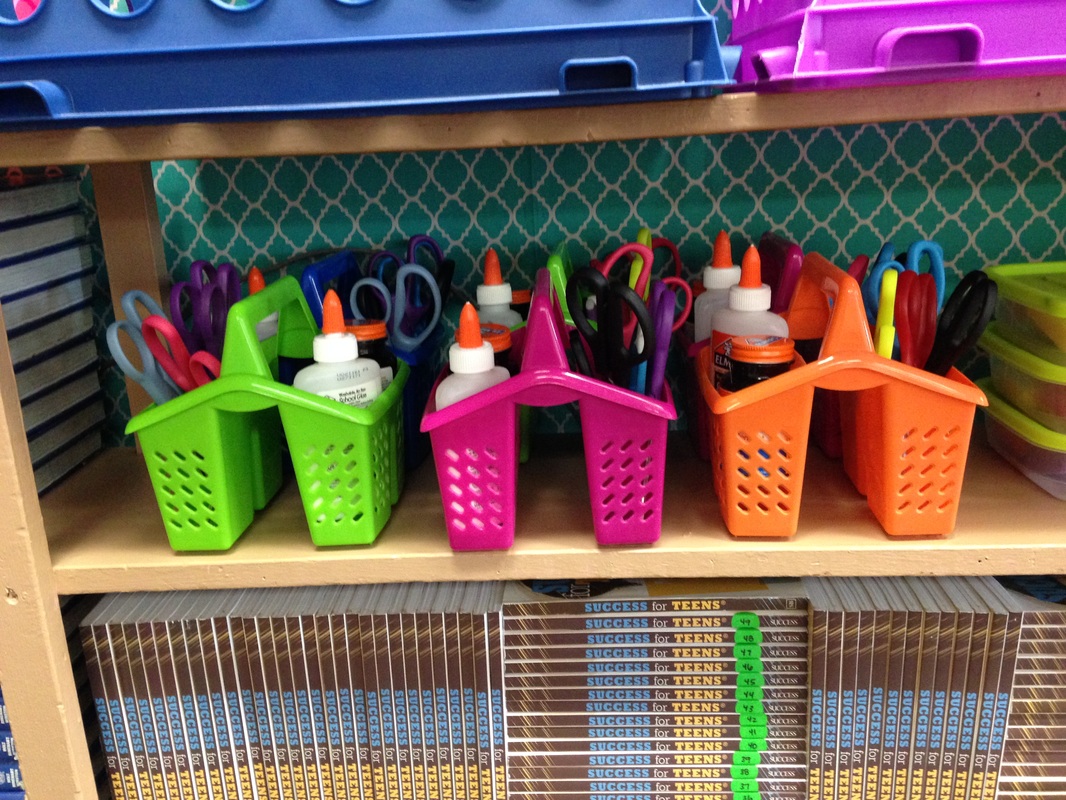
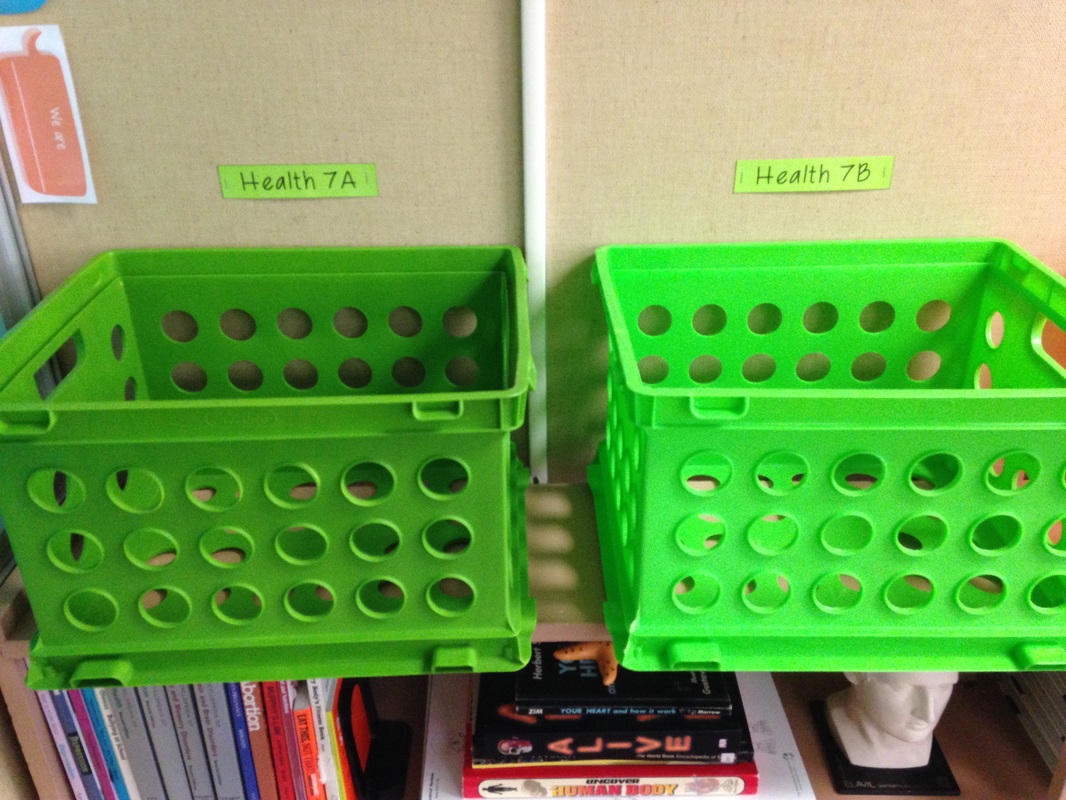
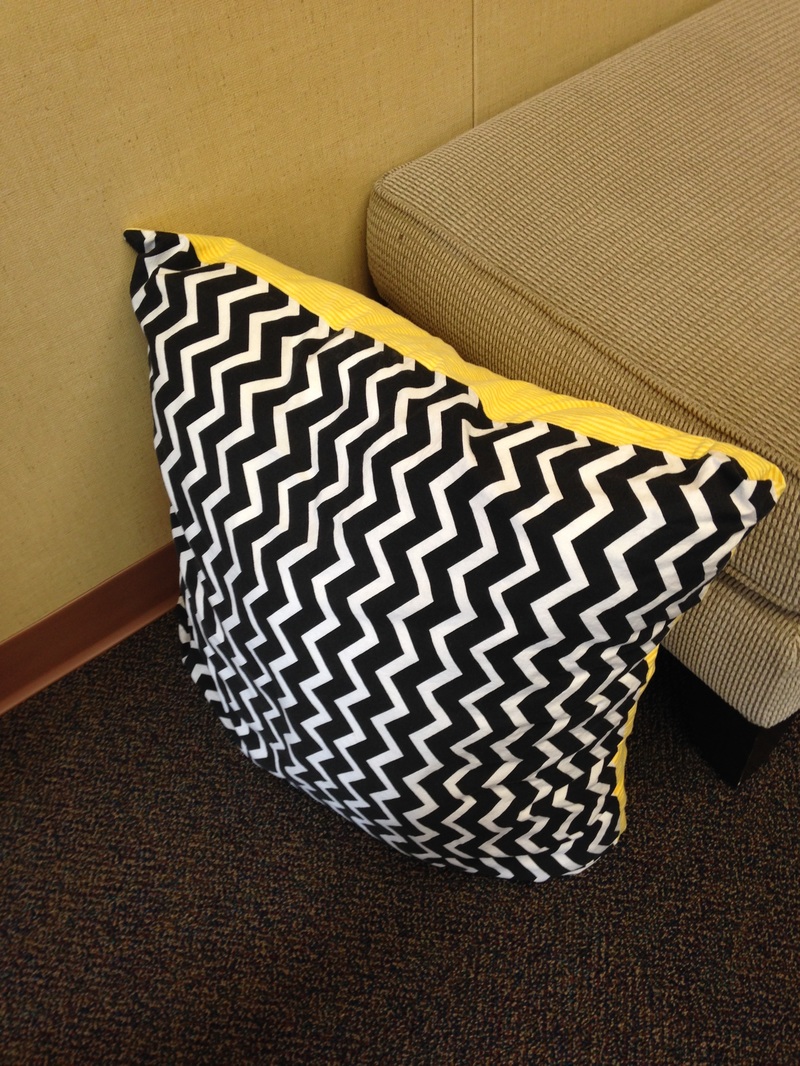
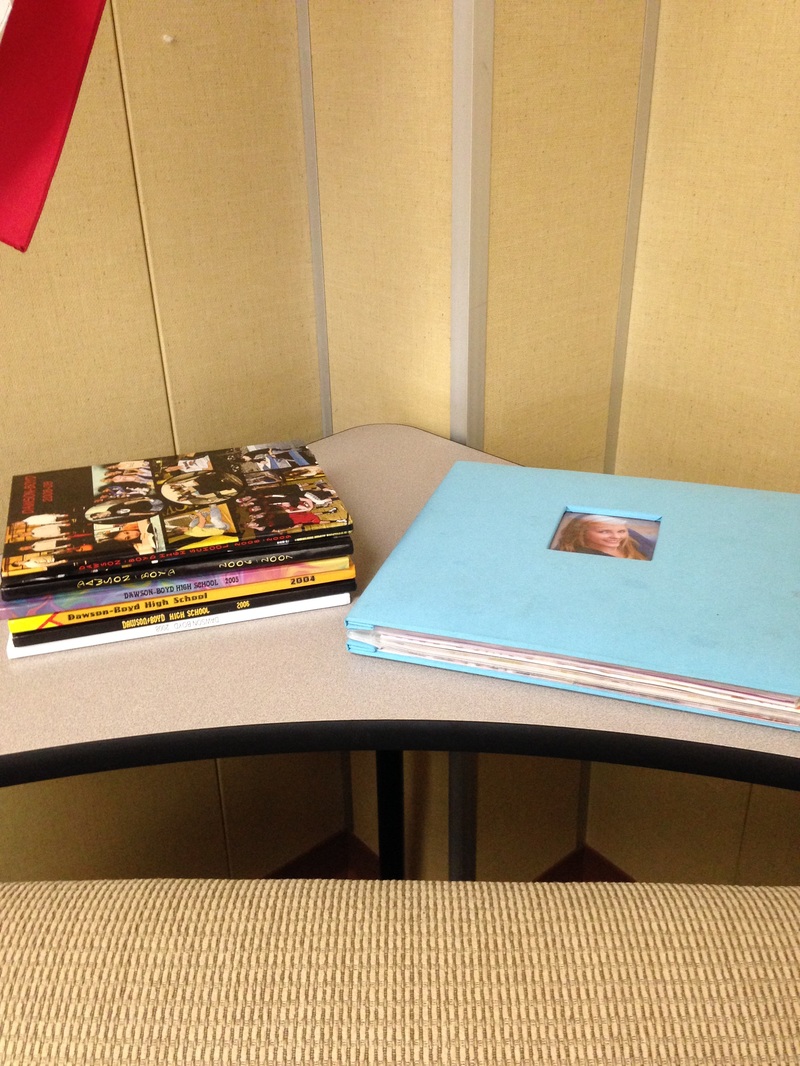
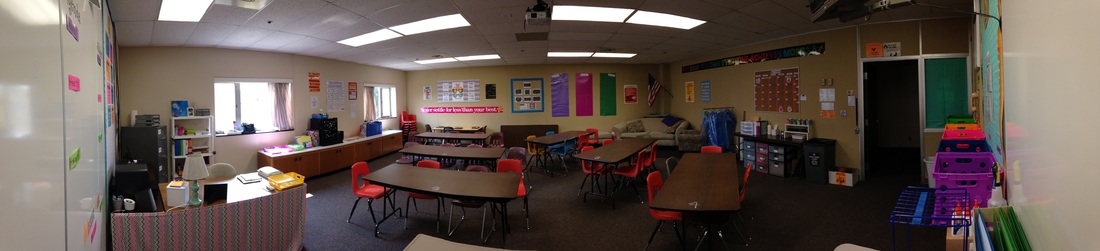 The school year has officially started & my room is finally together! So I'm going to take you on a little virtual tour & explain how I have my room set up in my new, much smaller space. First is the SC or Student Center. This is where everything that students might need is located. Picture 1 is the whole SC including the Calendar Board. As you can see in picture 2 I have two staplers, a tape dispenser, staple remover and three whole punch on the middle shelf. Above that are buckets. Each of them contains something different including, various size rubber bands, large paperclips, tacks for the calendar board, binder clips, and small paper clips. I have a bunch of different patterned buckets that I use for various things throughout the classroom. I found them in the dollar section at Target so now every time I go to target (which is a lot) I check out the dollar section because they have new patterns all the time. Below I have a basket (I also have a lot of these which I bought at Walmart they come in 3 different sizes) that contains small sticky notes, regular size sticky notes, and note cards. On the SC, as shown in picture 3, I have an electric pencil sharpener, a bucket of highlighters, tissues, lotion, hand sanitizer, and the Extra's binders (I will explain this system & the Calendar Board in another post). I usually also have disinfecting wipes on here, but they haven't come in yet. The janitors provide them which is fantastic. In picture 4 you can see the inside of one of the white drawers. This one has extra pencils, pens, white out, pencil top erasers, and regular erasers that students can use if and when they come to class unprepared. This year I put decorative tape on them so that I know if they are using one of mine or their own. Last year, I went through pencils like crazy because students would take 10 at a time and never return them so when someone needed a pencil I had none left. I was also a little more strict when I explained using the pencil drawer. Hopefully by using both methods I won't go through quite as many pencils. In picture 5 you can see one of the lower drawers, specifically the crayon drawer. The little boxes you see inside are soap boxes (found at Walmart) which contain a handful of different color crayons. It worked really well last year because the boxes held up very well and kept the crayons in good condition. The last picture, picture 6, is of the colored paper drawer from the black colored drawers. Each different color of paper is in a separate hanging file. This great for students because they can see what colors they have to choose from, grab what they need and go. There's no digging through piles of mixed papers. This is also great for myself because it doesn't take up a lot of different space, like having many stacks of different colored paper laid out would, yet I can fit many different colors of paper in this one drawer. If you are interested in where I got the large drawers under the table, I bought the black drawers at Target and the lower pink and blue drawers at Walmart. The smaller white drawers on top of the table I bought at Target. If you look at picture 1 you can see that each of the drawers has a label, shown below (made using PicMonkey), that describes what is inside. The blue drawers contain markers, colored pencils, and crayons; the pink drawers contain scissors, glue, and rulers; and the top two smaller drawers of the black drawers contain scissors and extra notebooks in them.       The last few things located in the SC are a few clipboards under the table in a metal basket, yardsticks off to the side, garbage bin, recycling can and bottle bin (paper recycling bin is on the other side of doorway), and located on the wall are the different class schedules (Two-hour late start, pep fest, etc), the master schedule (when other teachers have class), and the sign out board with hall passes. Next we have a few different areas of the room. Picture 1 is of the bookshelf that stores not only the textbooks but also their table bins, glue sponges, and notebook bins. Picture 2 is of the table bins which contain glue & scissors. I have enough bins for each table to have one which saves a lot of time when we need to cut and glue things into our notebooks. Picture 3 is a close up of Health 7's notebook bins. The students keep their notebooks in here so that they don't get lost. Picture 4 is of the cozy or comfy area of the room where students can work during free time. The pillow in picture 5 is another alternative seating option that my Aunts, Grandma, my Mom and I made last year. Picture 6 is of my high school yearbooks and my senior graduation scrapbook for my students to look through when they have free time. They enjoy looking through them, it was something I wish I would have had while student teaching (and at least this way they are getting looked at). 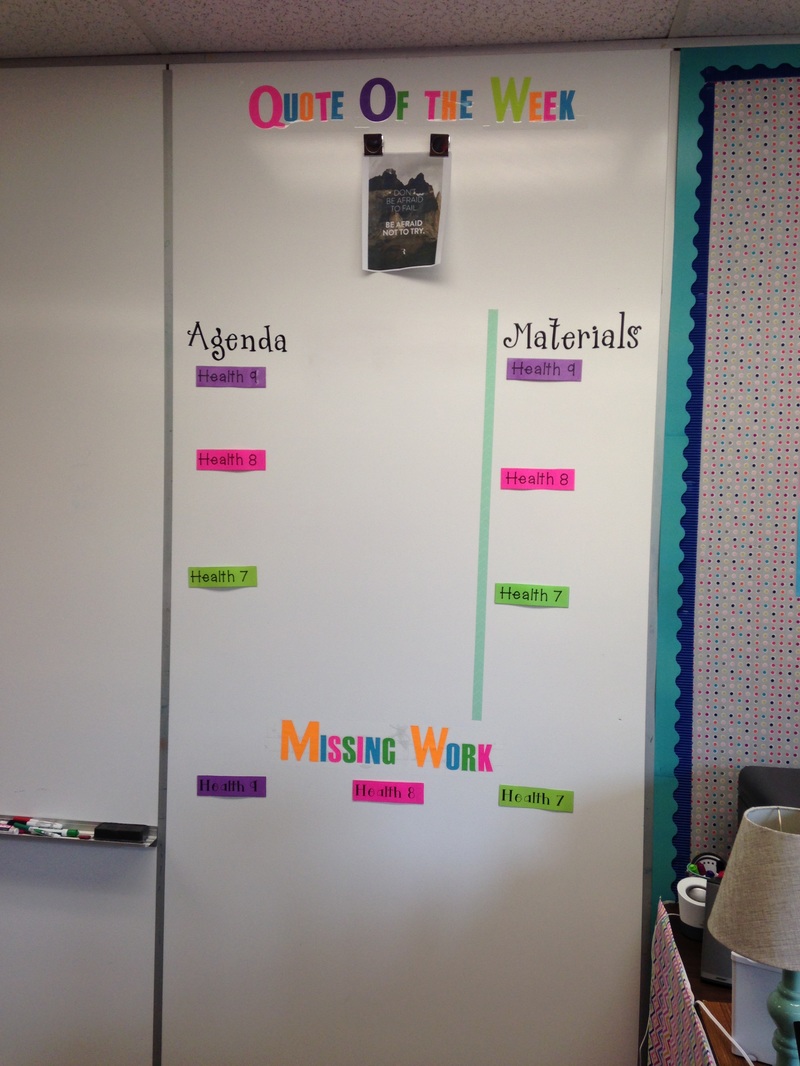 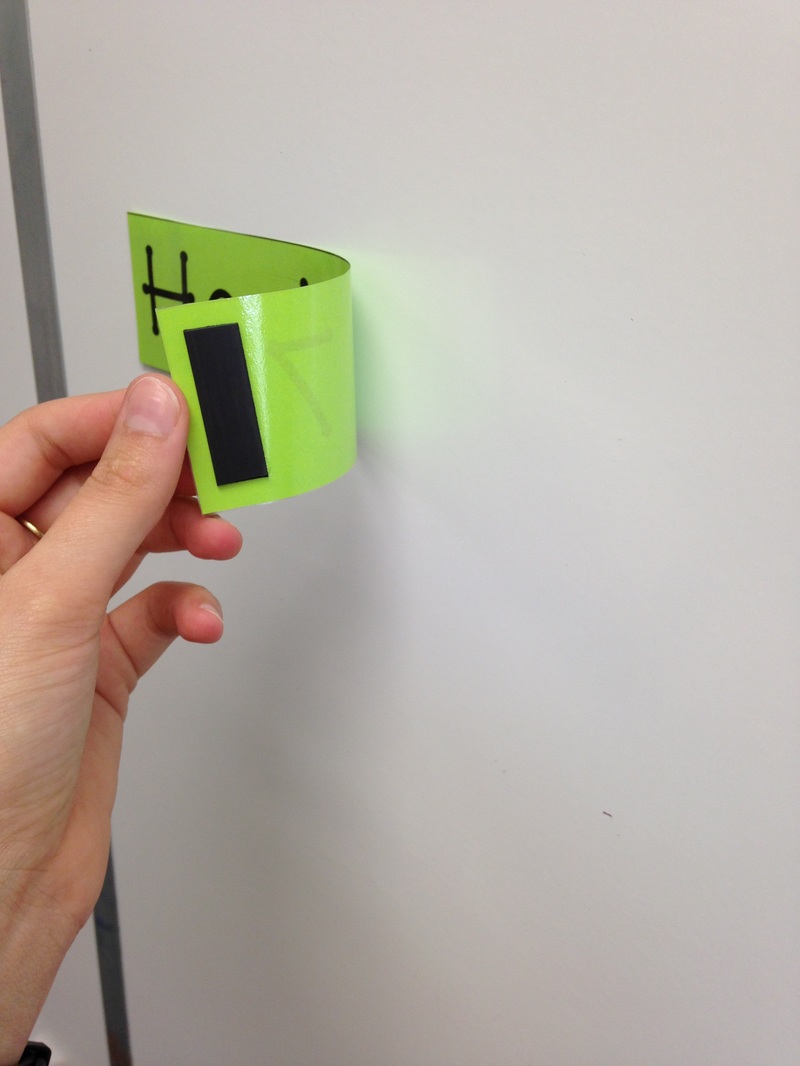 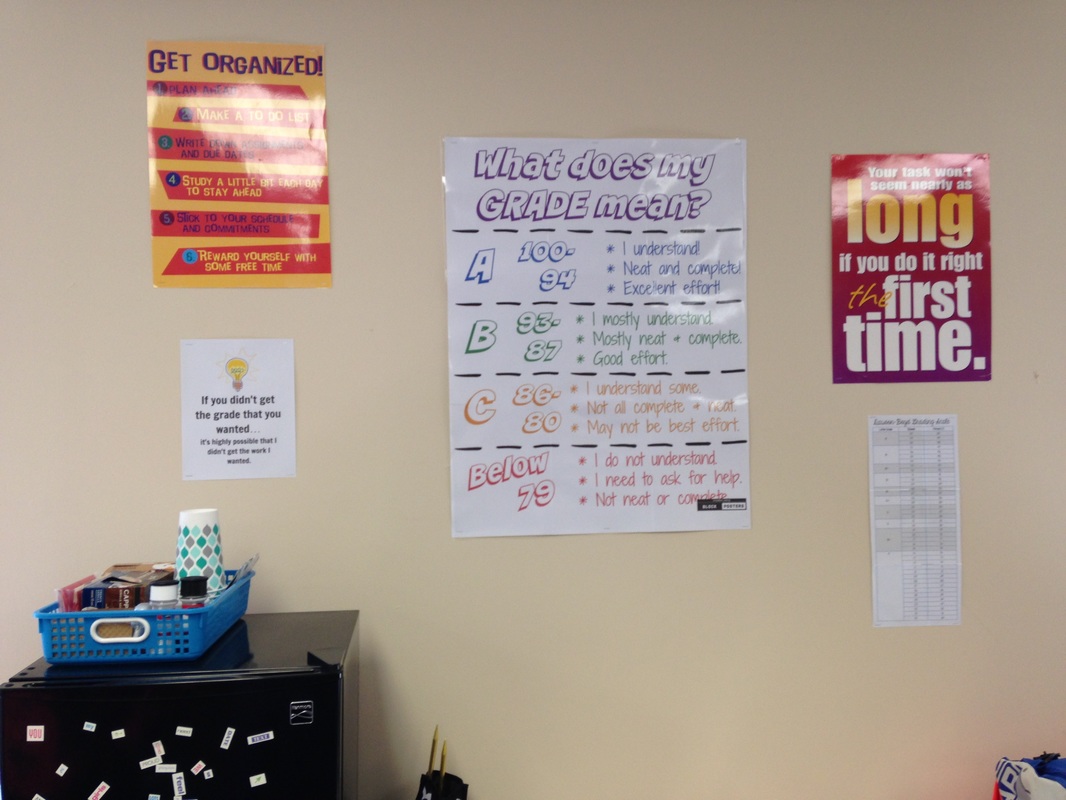 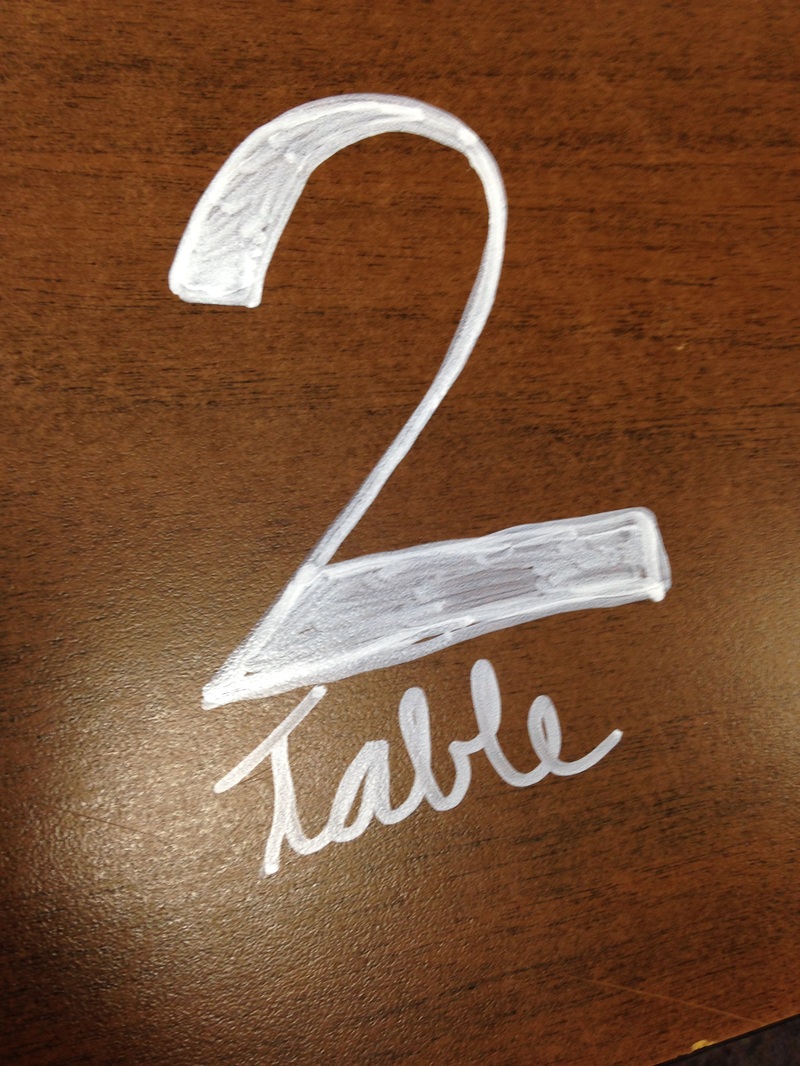 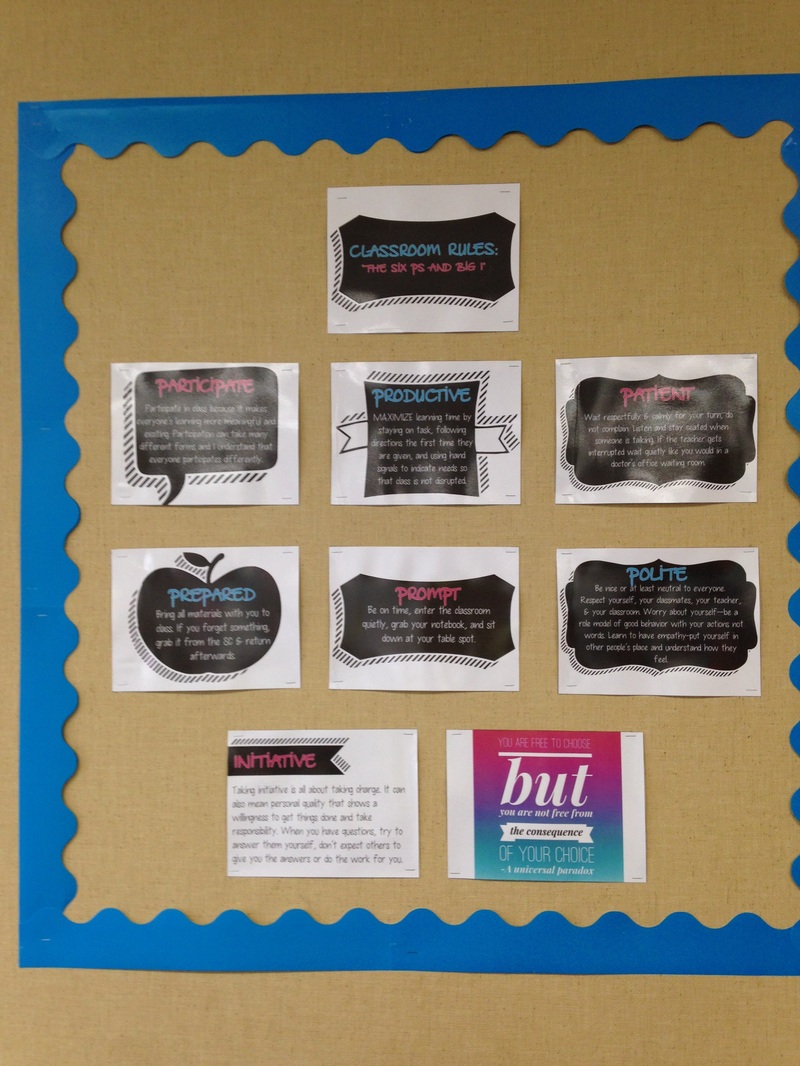 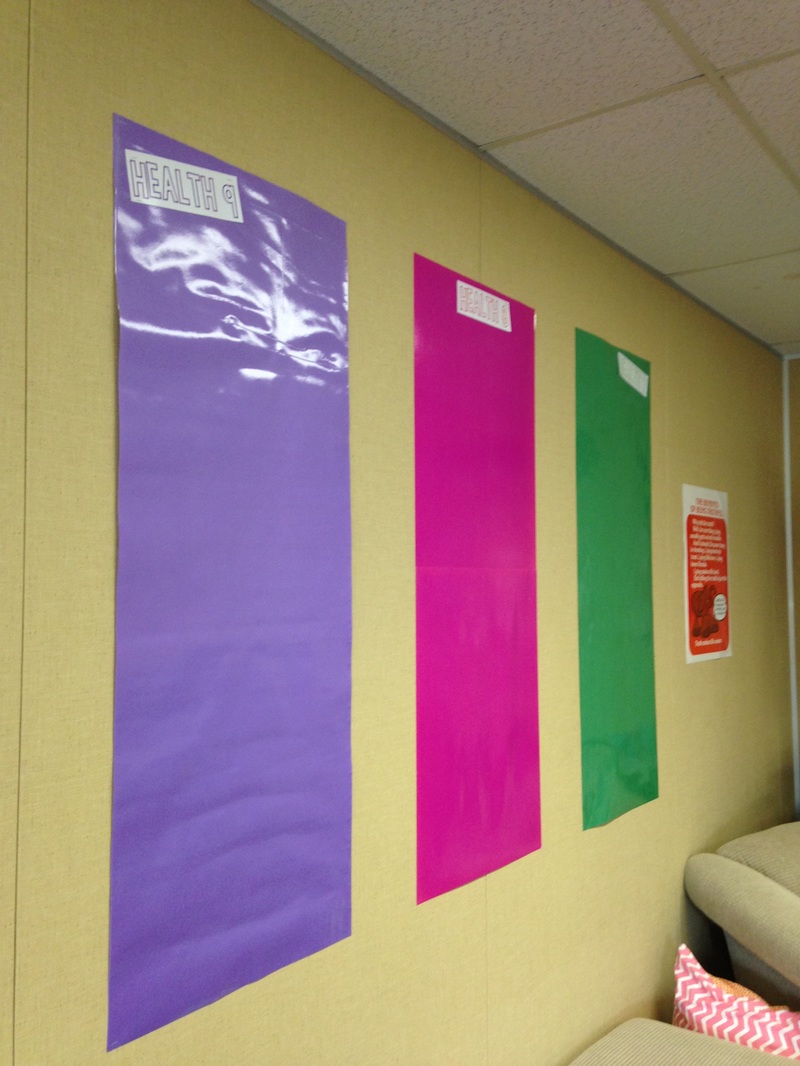 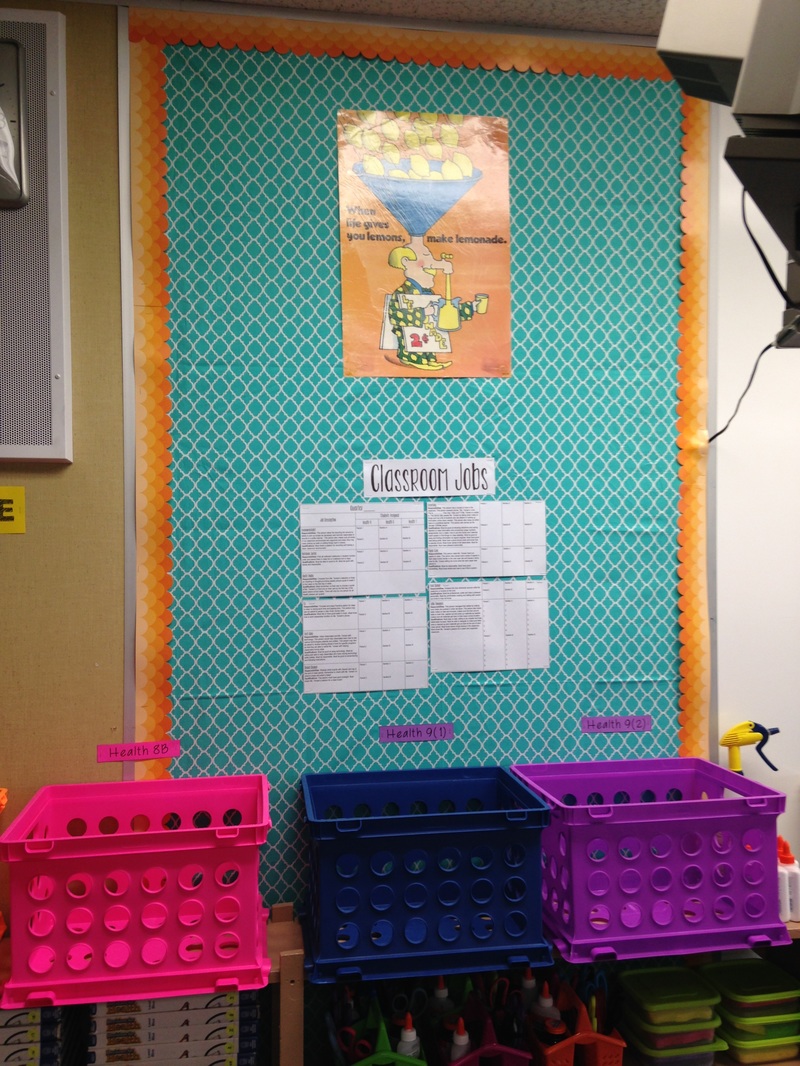 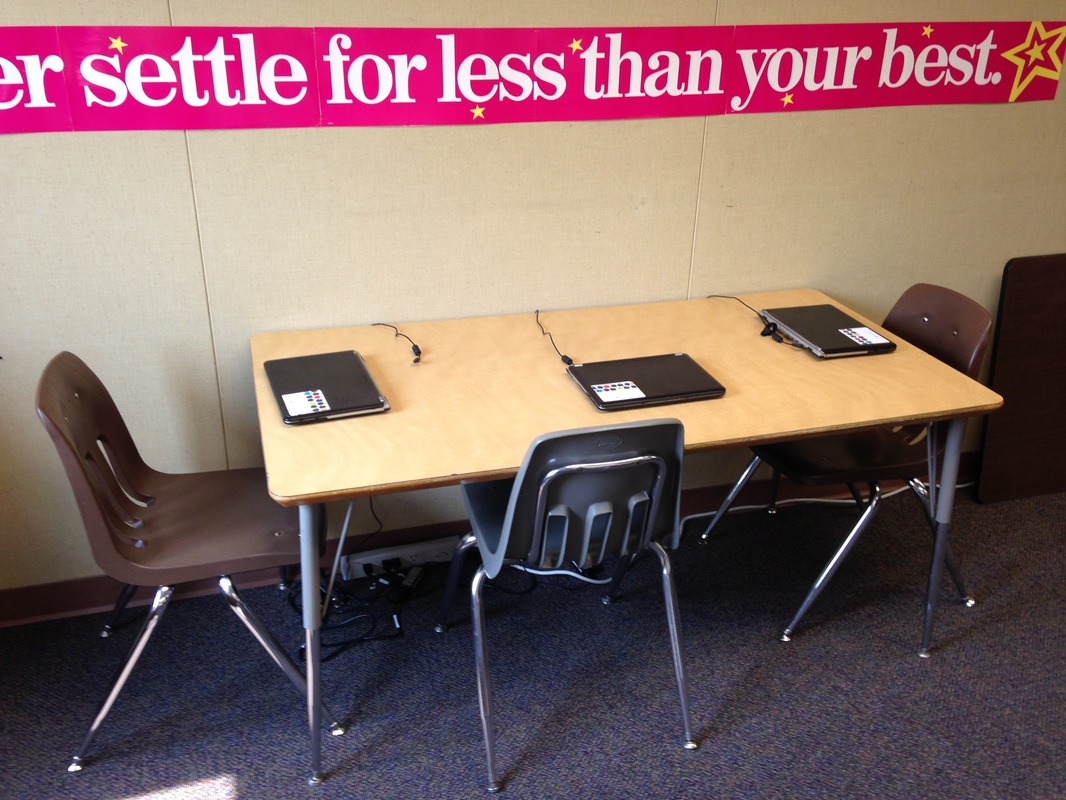 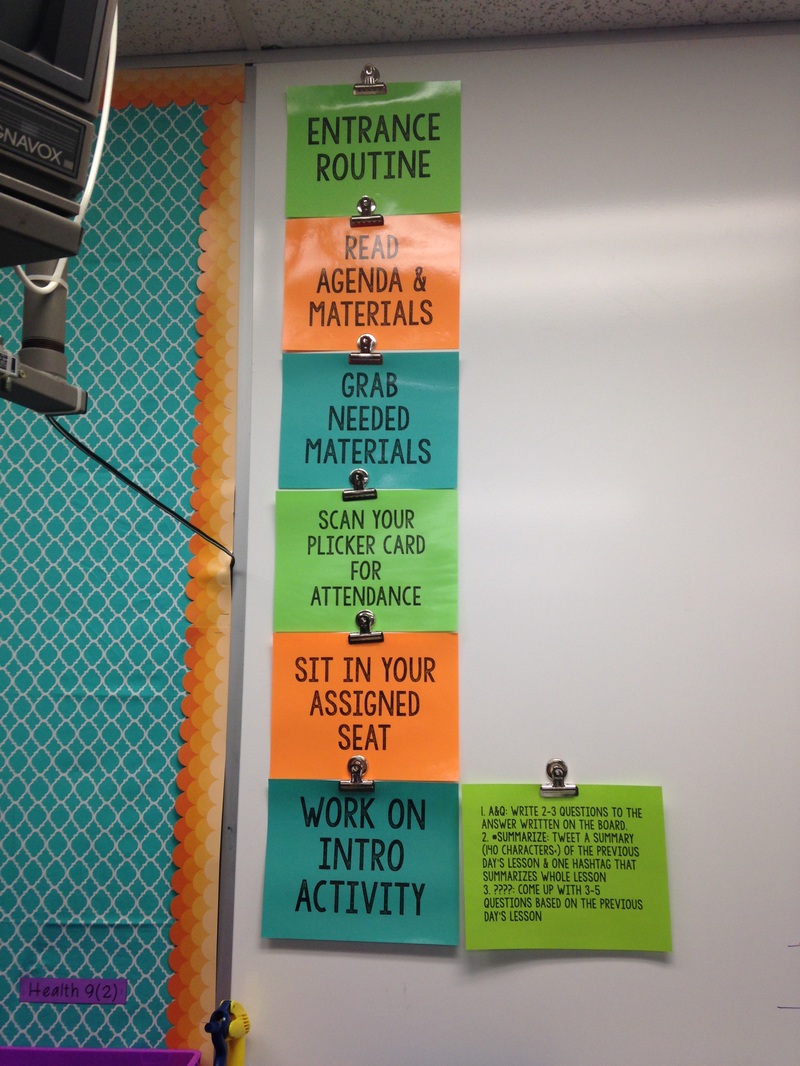 Here some more parts of my room. In picture 1 I have my agenda, materials, missing work and quote of the week board area. This has worked very well so far this year. I often forget to talk to students when they are missing assignments because class goes by so quickly and I only see the 7/8th graders every other day. So this is my way of telling them they are missing work. It teaches them some responsibility and independence as well because it is their responsibility to check it and get the work to me. Picture 2 is of the back of the class tags. Last year I wrote out all the different health classes for the agenda and that got old so this year I typed them up on the class's color paper laminated them and put magnets on the back! Picture 3 is of my grading wall. I made the poster in the middle using PicMonkey and Block Posters. I got the idea from Pinterest. I also have our school's grading scale a few other grade-related posters, and my favorite sassy poster. It says If you didn't get the grade that you wanted...it's highly possible that I didn;t get the work I wanted. I found that idea on Pinterest as well, I just made my own. Picture 4 is of my table numbers. Last year I taped paper on the tables, but the tape kept getting peeled up and when I'd redo them sticky residue would get left on the table which was a pain to get off. So this year I bought oil-based Paint Sharpies and wrote on the tables with it. It can be taken off using Expo markers and stays on when the janitors wash my tables. I found this idea of Pinterest. Picture 5 is of my classroom rules. I've already changed them, but at least this is what they were at the beginning of the year. I just condensed these 7 rules into 4 to make them easier to remember. Picture 6 is of my class spots. This is where I will post the need to know's and other information related to what the class is currently doing in class. Picture 7 is of my other bulletin board with the class job assignment poster. I bought fabric from Jo-Ann Fabrics for the background. Picture 8 is of my Chromebook table. Last year I got a grant to buy these for my classroom instead of getting desktop computers. Students can use these to check their grades, look things up, etc. The Chromebooks stay at this table where their chargers are plugged into a power strip. It has been working very nicely especially in my study hall. Picture 9 is of my entrance routine which I also have already changed. I will post new pictures of both soon! I also have re-done my syllabi so I will get a post about both soon! 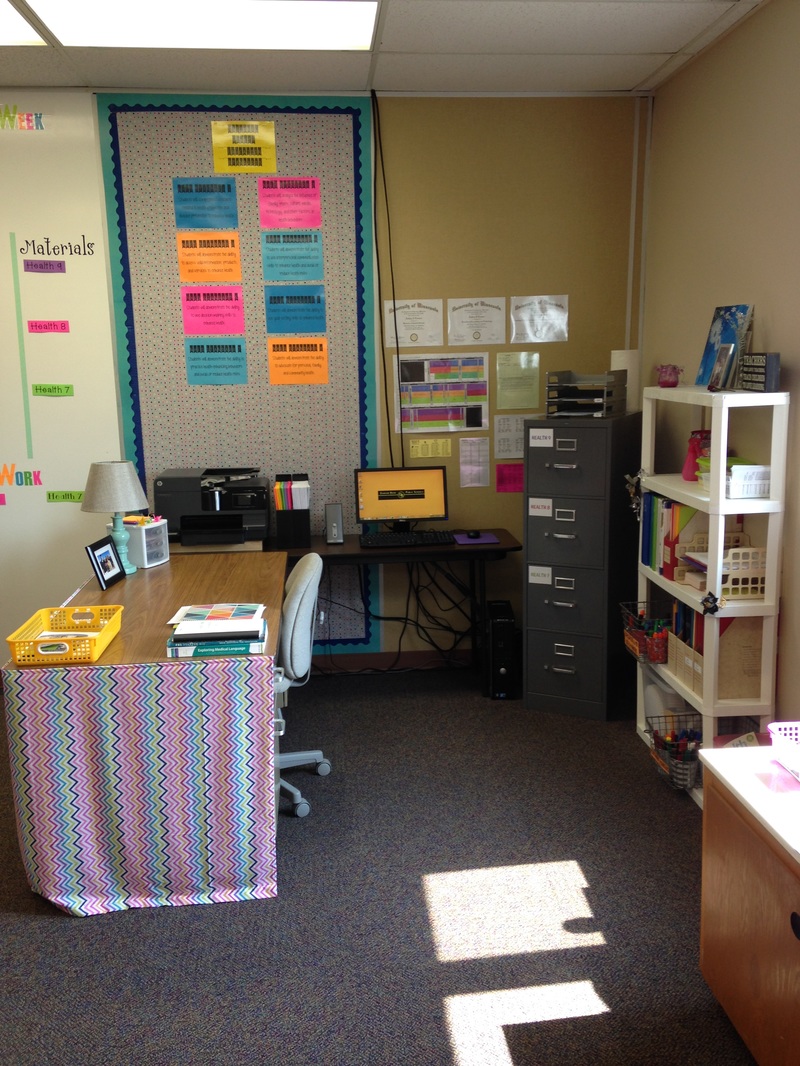 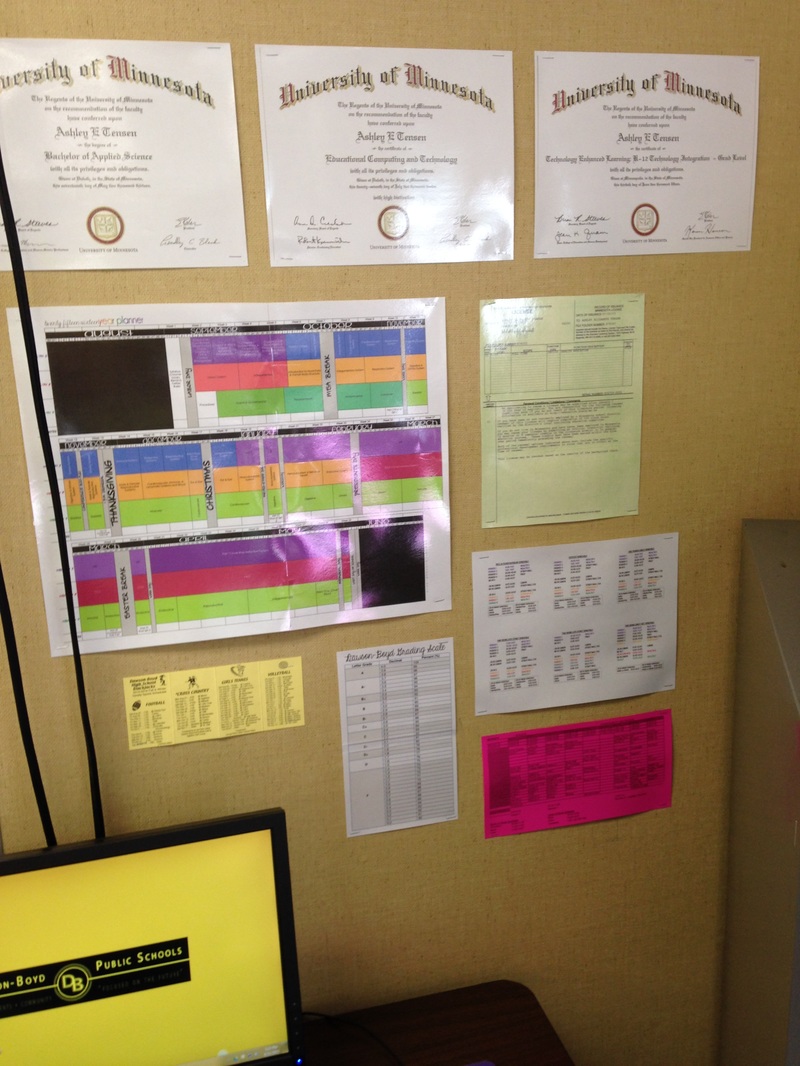 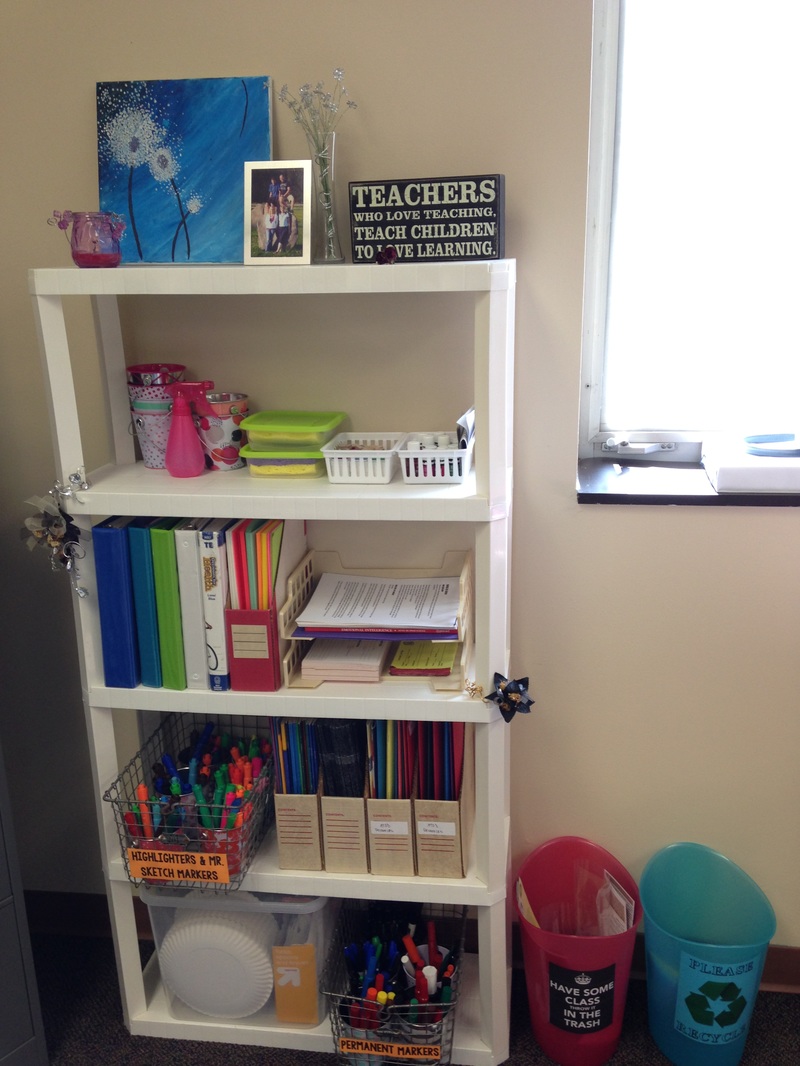 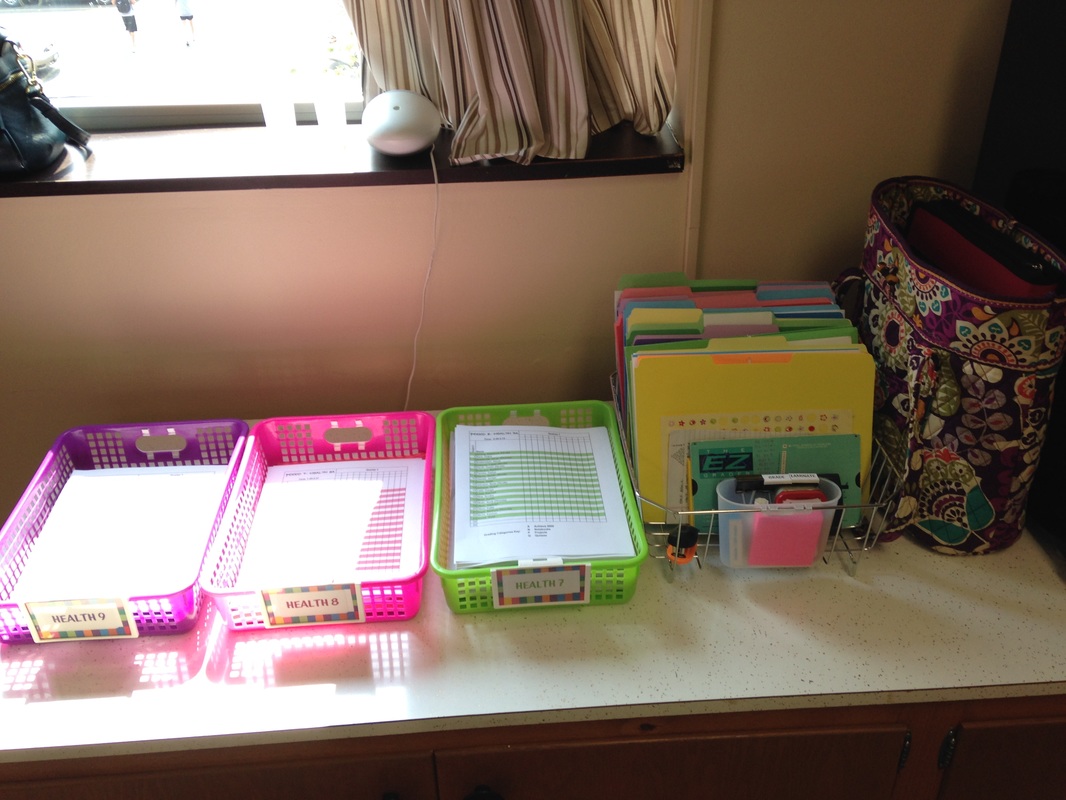 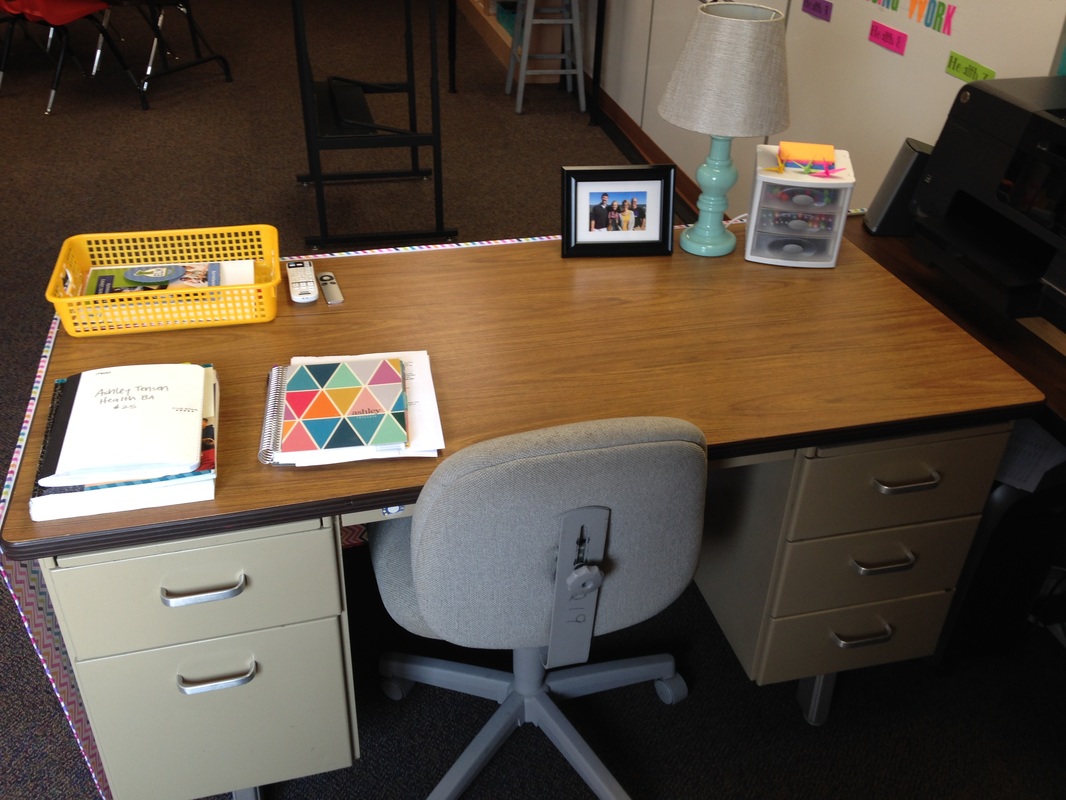 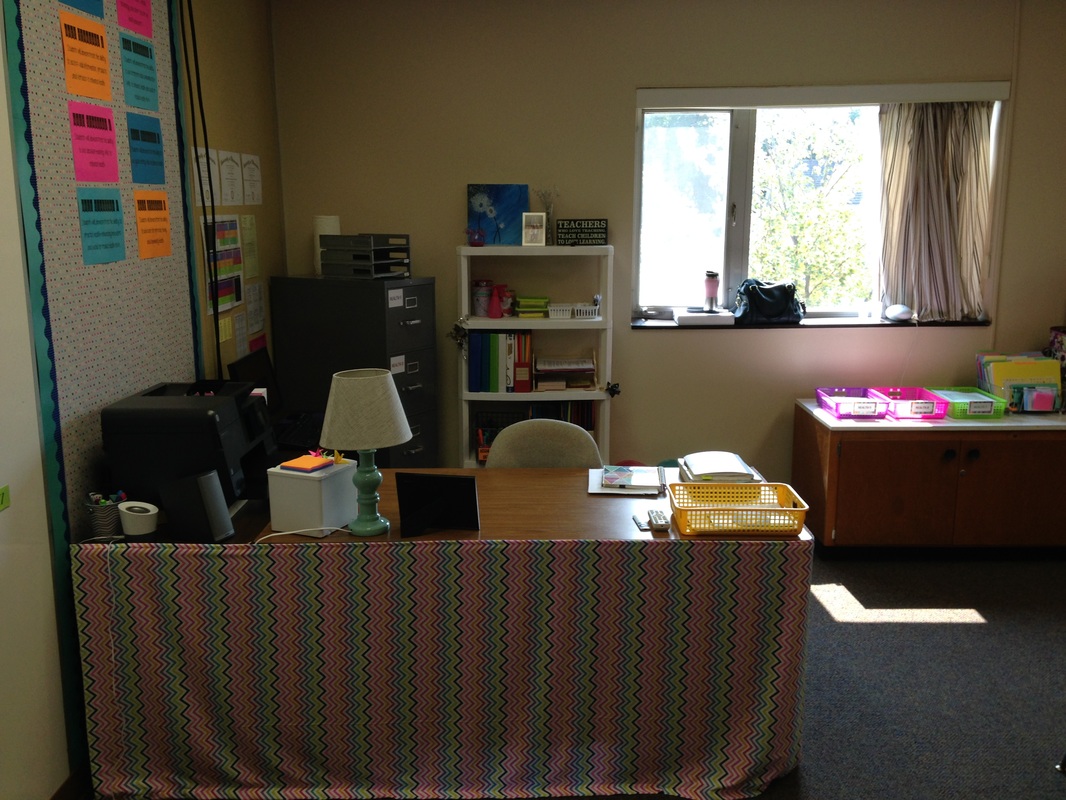  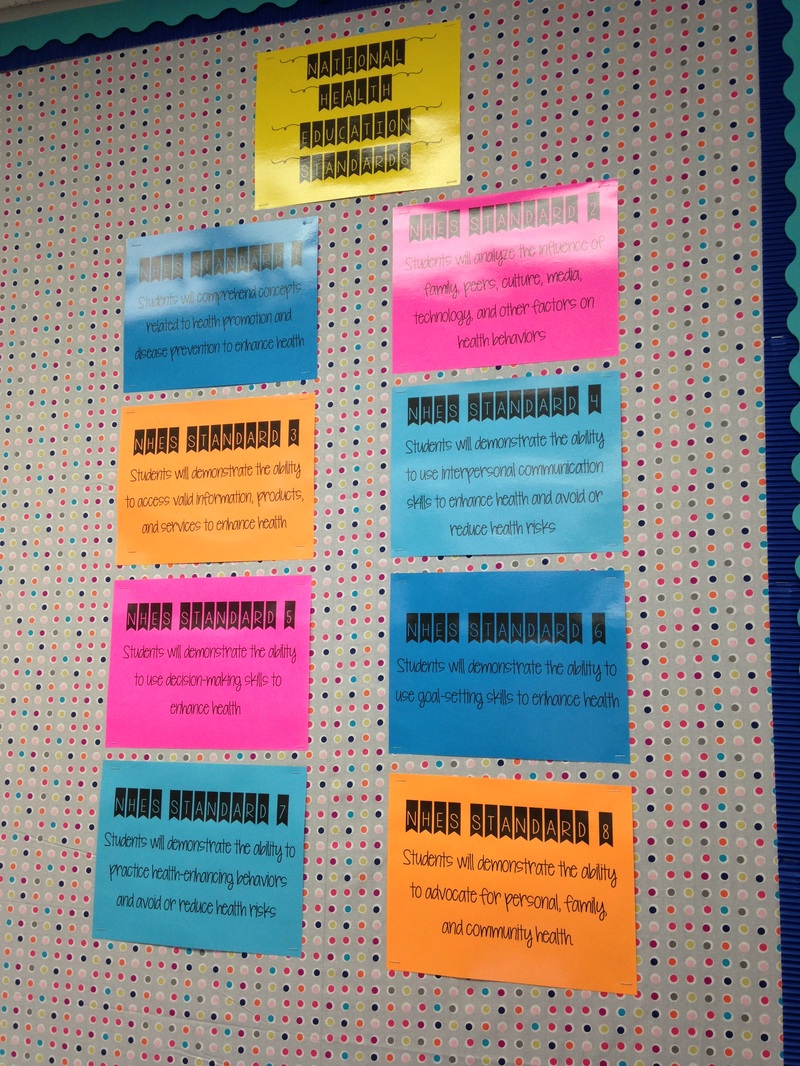 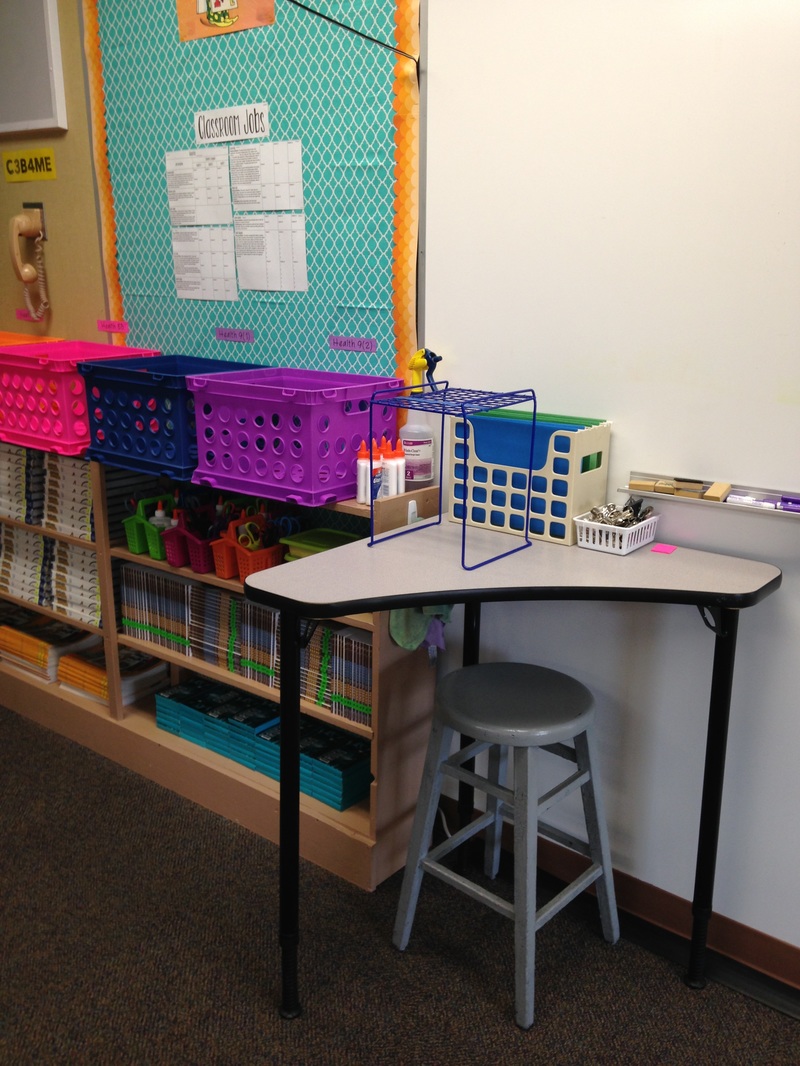 Finally my desk area! I love this area of my classroom. It's so much better of a set up than last year. Picture 1 is of the whole area. This year my filing cabinet is in my desk area which is awesome. Picture 2 is a close up of what I have by my computer. I have my diplomas, teaching license, year plan for all my health classes (I bought this on TPT from Traci Clausen- it also came with weekly planners which I am using to do my lesson planning this year), grading scale, early out/late start schedules, and the master schedule so I know when other teachers have class. I have also added the sports schedules, a bucket of pens, and late slips to this area. It's so nice to have it all right there when I am planning things. Picture 3 is of my bookshelf. I love that I have it right behind my desk as extra storage this year it is a definite help with keeping things organized and off my desk. Picture 4 is of my class baskets and dish rack of file folders. In the dishrack, I keep original copies of sheets I make copies of throughout the year in file folders. In the baskets is where I keep my copy of health notebook for kids to look at if they miss class, as well as the grading sheets and copies of handouts that I make. These are also fitting with the colors. Last year I didn't have different colors for each class and this year it's been so nice to have it set up like that. 9th grade is purple, 8th grade is pink or red and 7th grade is green. My filing cabinet is also color coded this way using colored hanging files/labels on the color by drawer and unit. I did that last year, but I am still in love with it. Picture 5 is of my desk. I don't like having to much on it just the basics so that I can get work done. It doesn't always look like this throughout the day, but it does before I leave. I like coming into a clean classroom in the morning not yesterday's mess. (I will have a post about my end of day and week routine soon). Picture 6 is from the door. The desk skirt was made by my Grandma. We bought the fabric at Jo-Ann's and then sewed velcro on one end and I bought sticky back velcro and attached it to my desk. I really like how it turned out. Last year I used a plastic table cloth and the fabric is holding up much better. Picture 7 is of the inside of one of my drawers. They all pretty much look like this and I love how each drawer is used. Picture 8 is of the Nation Health Education Standards that I created and posted above my desk area. I added my goals for the 2015-16 school year under the standards. Picture 9 is of one of my front tables. I have reorganized this as well so I will post a new picture later. It has worked out really well so far to keeping the things I need while teaching right there at the front. So there you have it! A tour of my new classroom for the 2015-2016 school year. I really like how it all came together especially since I downsized a lot when I moved to this room. I love having windows this year as well as the layout of the room. It's been nice having everything close together in a distinct teacher zone area. Last year my stuff was spread out all over the room because it was so big and it was hard for the students to know what was their space and what was my space. This year everything is in one area for me as well as the students. So needless to say I like having a smaller room. It makes the learning environment feel cozier. That's all for now! Let me know what you think or if you have any questions. Thanks for reading! 
So this year I am trying something new by having my students have classroom jobs. Last year I spent a lot of mine time doing the various jobs below, especially cleaning, straightening things up, putting things back where they were supposed to do. I saw on Pinterest a picture with classroom jobs for middle school students and was intrigued. I had only seen classroom jobs used in elementary classrooms, but I liked the idea of putting some of the responsibility of keeping our classroom environment organized and clean on the students so I did some research. From that research, I found these two posts below where I got a lot of my inspiration when I was creating the jobs and writing up the job descriptions for my classroom.
Here is what I came up with for my classroom jobs. I like the descriptions of responsibilities and qualifications turned out and the variety of jobs I came up with. I think this will be a big help to me this year.
I think the trickiest part about having classroom jobs in a secondary classroom is how to set it up and display it so that everyone knows who has what jobs & what their responsibilities are without me needed to remind people all the time. I have three different grade levels of health (Health 7, 8 & 9) with each grade level having two classes. The 7th & 8th sections rotate every other day with PE. I didn't want to make something that would be too much work for me to keep up & that I could use year after year without it being a pain. So below is a picture of what I came up with for displaying classroom jobs.
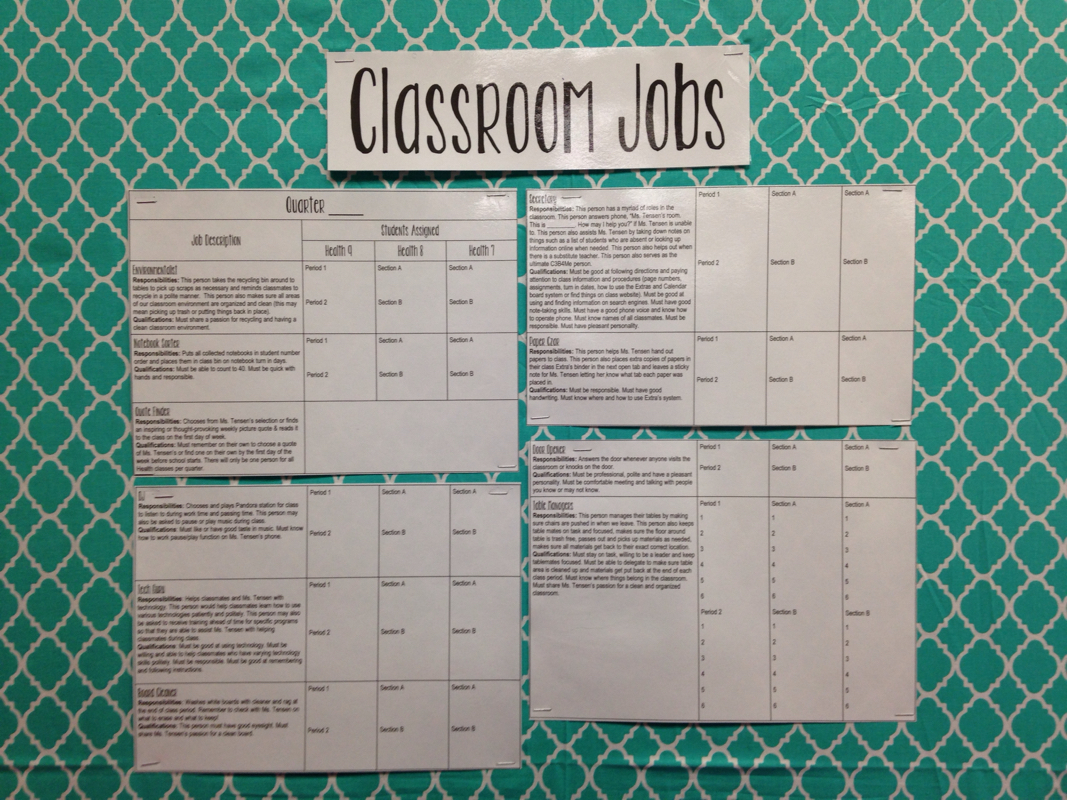
To make this I created a table in Microsoft Word and set the page up in landscape orientation. I added the classroom jobs and their descriptions to the one column and in the others, each class got their own column. Within each column, I separated the classes by section or period. I then laminated all the papers and hung them up on the bulletin board in the front of the classroom. After I have students apply, I can write their name, first name and last initial, under their class and section with whiteboard markers. At the end of each quarter, I can wipe it off and write the new students' names down next to their jobs on the chart. I think it should work pretty slick, but time will tell. Sometimes I think things will work a certain way but when you apply students to the mix it doesn't work as I planned. Later this year I will have to write another post to let you all know how it's working in my classes!
The new school year is fast approaching! I'm sure some of you have already started. This is my last week of "freedom" then next week is workshops and the week after that we start school already. Thankfully the first week is only three days because of labor day. I can't believe it has come so quickly. I am ready and not ready at the same time. AWE!!! It's year 2 for me! I feel not as prepared as I would like to be, but I know I am way more prepared than I was last year so I am happy about that. I keep having dreams about things not going well or me not being ready or my tables being switched with desks without my permission. It's ridiculous but at least this year I have an idea of what to expect this year which is comforting, the unknown is stressful. I also will not be attending school myself while teaching so that is going to be great to be able to focus on my teaching and curriculum this year. Overall I'm looking forward to year 2. I think it will be a good one. 
I do not remember where I found this idea anymore, but I know that it is an awesome idea & I love it! I implemented this policy during the second half of my first year when I was fed up with answering the same simple question 10 times because students were not paying attention. I mostly use this policy for questions like... "What page are we on?" "What did we do yesterday? I was gone." "What are we doing today?" "I lost the handout from yesterday. I can get another one?" "Where are the scissors?" These types of questions drive me crazy because if a student simply took the time to look or pay attention, the answer is usually right there. For example, all of the questions above have answers that students could easily find on a calendar slip, written on the Agenda (I include page numbers on my agenda), by asking a classmate who was present or paying attention, by looking at their class's weekly document on the class website, or by using/reading the labels on the SC. The key to using this policy is that you have the answers somewhere so that students are able to find them. How I manage this in my classroom is by having page numbers written on the Agenda, posting daily calendar slips, making sure each class's weekly online document is updated, including directions on the board or slides, and then saying it a least once out loud (often times I repeat it a few times intentionally and have my students repeat it too). At the beginning of the school year, I gave only verbal directions and it never went well for me. So after a few times of struggling through that I started to make sure that I had directions written in at least one place in my classroom for students to be able to see/find. Another reason I like this policy is that it works well with my classroom set up. The Student Center (SC), Extras Binder, Class Website, Calendar Board with calendar slips were all created so that students would be able to do things on their own. I will have a separate post on the details of all these things soon! Below is a picture of the policy from my syllabus where I explain the C3B4Me policy. As you can see at the end I wanted to emphasize that it's not that I don't want to help my students or answer their questions. To me, this policy is about teaching my students to take initiative, rather than relying on me to do or solve everything for them. I also want them to listen/pay attention the first time (because if you keep repeating things students learn tune you out because they know you will say it again so there is no need for them to pay attention the first time) and also how to use resources that they have available to them. Last year after I implemented this policy I did not have an issue with students not feeling comfortable asking questions but I wanted to make it clear that students can ask me questions. How this policy works in my classroom is that if a student asks a question that falls in the lines where students could answer it themselves by using a resource or asking a classmate such as any of the questions above, I tell the student "C3B4Me" and they usually figure out the answer on their own using one of the resources I have available for them to use. Many times students would politely say C3B4Me to another classmate if they asked a question such as what page something is on after I had said it and written it on the board. This policy worked really well with students getting makeup work. Before implementing C3B4Me, my students would ask me what they missed and never bother to use any of the resources I was spending time putting together for them. After implementation the students started to automatically do it on their own without even asking me because when they would ask me I would just say "C3B4Me" or "Did you look on the calendar board, online or talked to a classmate?" and if they said no I would tell them to start there and then if they still had questions they could come talk to me. Its beautiful! 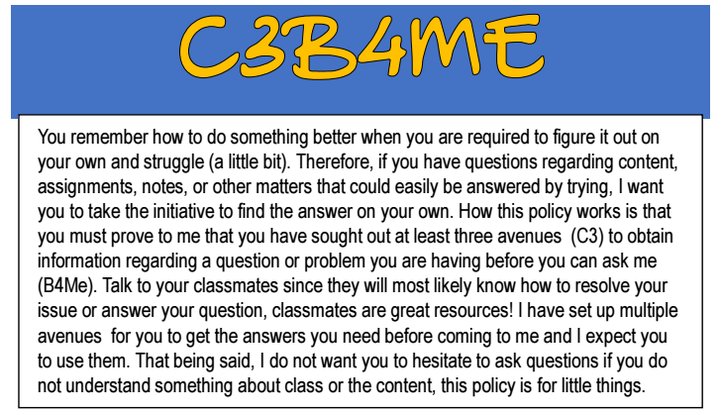  I know it has been a while since I've written on here, but life got busy and it is summertime so my work on school stuff slowed down. However, now that there is only a month, actually less than a month (CRAZINESS), until school begins I realized there is a lot that still needs to be done. Today I got back into my classroom and got some more work done. I have the set up pretty well done from earlier this summer, but now it's the finishing details which always take longer. I'm still waiting on a few things to be done to my room including getting my calendar board hung up, my projector installed, and getting my computer hooked up. Regardless I got a lot done today. Once the school year starts I hope to get more posts on here because I have a ton to share, I just need to take pictures of it and write about it! I am so excited to share my ideas with you all on here so just be patient with me, I promise I didn't stop posting! As a sign of good faith, below is a preview of my soon to come classroom reveal. 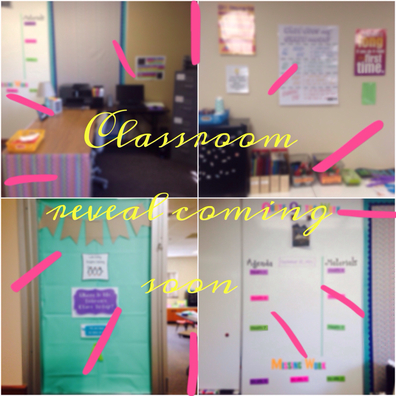 Enjoy your last few weeks of summer vacation everyone & keep checking back! There are many more posts to come in the next few weeks as I get things finished up for the beginning of the school year. 
This year I decided I wanted to create my own classroom rules or code of conduct to fit the type of classroom environment I want to create for my students. I tried having my class create rule or jobs last year, but it didn't really work all that well. There were things that my students did or didn't do that drove me crazy last year so I created these rules to help fix some of those behaviors. When looking for inspiration on Pinterest I found this "Classroom Rules- The 5 P's" idea and I really liked it. I adjusted it a little to fit my needs and I added the Big I because helping my students learn to take initiative is a huge goal of mine. So below is the poster size version of my classroom rules! Let me know what you think.
So now that I had created new rules from my classroom, I wanted to reformat and adjust my classroom syllabi. Most middle and high school syllabi are 2-4 pages (one sided) if there even is one. Mine last year was 5-6 pages long (one-sided). I think my students (and other teachers probably) thought I went a little overboard. Even so, to me a syllabus is a place where all of the classroom policies and information about a class are located. I wanted my students to know up front what my expectations and policies were so that there were no surprises later. I didn't want my students to be able to say...
"Oh I didn't know about that" or "That's not fair, you let him do ______."
I still believe this about my syllabus for this coming school year. It still contains all of the information I think they need to know to be prepared for my class. However, I've condensed my explanations and made it more visually interesting. I also took out some policies that I didn't use or had changed my mind about during my first year of teaching.
I got this idea about making my syllabus more visually interesting from Jackie at Room 213. She had a post about making a digital syllabus and it included a FREE template. So I used her fantastic template and made it my own by changing colors, fonts, and adding my own information. I am so grateful to her for sharing such a wonderful free resource!
So without further ado, here is my Health 9 Syllabus for this year.
If you would like to learn how to embed PDFs from Google Drive like I have done above, click the "Read More" below!

|
Author

I teach 7-9 Health Education & Computer 7 in rural southwestern Minnesota. I love using technology in my classroom and teaching students about how to live healthy and informed lives.
Archives
April 2016
Categories
All
|


 RSS Feed
